
An AR bike box in action.
One of the small innovations introduced by Geocentric Outdoors when they took over management of the Adventure Racing World Series was to standardise the mandatory equipment list across all constituent races. One gear item that is normally regulated across races are competitor’s bike boxes, requiring them to be of a size typically transported by an airline carrier: 140cm x 80cm x 30cm. These bike boxes can have a harder time than the racers themselves during an expedition race, so it pays to have something built of sturdy material, for example corflute, particularly if you plan to use it for more than one race.
Competitors have a number of options in sourcing a bike box for an expedition race. The cheap and nasty way is to buy a cardboard box from an airline and cover it in contact, however this setup will fall apart quickly and will not last more than a single race, and is often not allowed by certain event organisers. The more expensive option is to buy a commercial bike box – EnviroBikeBox is the only supplier I’m aware of in Australia, however I have seen the buckles on these boxes fail consistently (a result of race volunteers carrying the box by the straps), and the fact that the box is opened from the side and not the top is not ideal for packing the box in race transition areas in my opinion. Box4Bike have previously produced excellent bike boxes – mine is still going strong after almost a dozen interstate and international races – however they will only place a large order at any given time. And the box itself, while sturdy, lacks handles on the end and is on the slightly heavier side which can hurt when weight at the check in counter and with race restrictions counting every gram.
The great intermediate option is to build a bike box yourself and customise it with your own personal preferences. An article by former world champions Orion Health has previously been published by ARea51 on a bike box build instructions. However a close friend to Rogue Adventure, Mark Wilson, thought he would try his hand at his own build project and I wanted to share his insights. A downloadable PDF version of his instructions can be found here. Thanks Mark for letting us share.
Edited Note: For our Brisbane readers, Mark sourced his corflute from BFS Plastics in Salisbury.
UPDATE MARCH 2020: A new player in the bike box market has entered the game. The BikeBox Company produces a box that is designed by adventure races and looks like it ticks all the boxes. A number of competitors have been using these in Expedition Africa for a while now. You can see their flyer here: BikeBox Company Flyer
Alternatively, another company called CrateWorks also produce an AR compatible corflute bike box. To be honest, I haven’t given them a close look, but they may well be worth investigating if you are in the market for a bike box.
Instructions to build a corflute bike box to standard airline dimensions (1400 x 800 x 300 mm)
- Purchase corflute with dimensions to meet requirements shown in drawing.
- Corflute thickness 5 mm.
- One main piece and two end pieces are required.
- Ensure the flute (internal walls within corflute) are running lengthways within the main piece. This means the flute will run across (perpendicular to) the creases at the top and bottom of the box, providing strength in the creases that are flexed each time the box is used.
- To provide a neat finish, have the corflute cut to overall dimensions by the supplier if they offer this service.
- To fit the corflute into a standard car, the main piece at least will need to be cut, scored and folded.
- Make all remaining cuts to the corflute to the finished dimensions shown in the drawing.
- Use a sharp knife.
- The pink lines in the drawing indicate the direction of the flute within the sheets.
- Score the corflute.
- Where indicated by the brown lines in the drawing.
- Use a thin blunt tool such as the back of a butter knife.
- Do not cut the surface of the corflute when scoring as this will weaken the crease.
- Be gentle when scoring the vertical creases in the end pieces. They are weaker because the flute does not cross them.
- Lightly sand, clean and dry the surfaces to be glued.
- Glue the corflute.
- Ritetack Instant Grab Adhesive is effective. Most adhesives including this one do not recommend use on polypropylene, from which corflute is made. This glue was as strong as the corflute in destructive testing.
- Use a caulking gun to apply.
- There is some time to reposition corflute after gluing; it is not strictly instant grab.
- Glue in three stages: bottom flaps, flaps of one side, then flaps of the other side.
- Two people are required to glue – one for each end.
- Allow 24 hours for glue to cure between stages.
- Apply weights such as bricks to maintain pressure during curing.
- Glue hook and loop fastener to the top flaps.
- 5 pieces of 100 x 50 mm are effective.
- Cut handholds and reinforce by gluing backing pieces of corflute. Alternatively lift using luggage straps around the box.
- Trim all sharp corners from the corflute using scissors.
- Cover sharp external and internal edges using an adhesive fabric tape (50 mm wide).
The finished weight of the box is 4.6 kg.
In Brisbane, corflute and adhesive were available from BFS Plastics, Salisbury, www.bfsplastics.com.au. They cut to size and offer a service to construct boxes.
Alternative concepts
- The instructions describe a bike box that cannot be collapsed for storage when not in use, which is the most robust design. An alternative is to have flaps on the bottom that are taped rather than glued so the box can collapse, in the same way as a standard cardboard box.
- The box described is designed to be made from the 1500 mm wide corflute that was available. If corflute sheets approx. 3500 mm wide can be sourced, a single sheet can be wrapped lengthways with a single glued seam at one end. The reduced number of joints increases reliability. The corflute should be orientated with the flute running across the creases of the flaps at the top so that the creases are less likely to crack during use.
- A small trolley can be made to slot under baggage straps, as shown in photos.
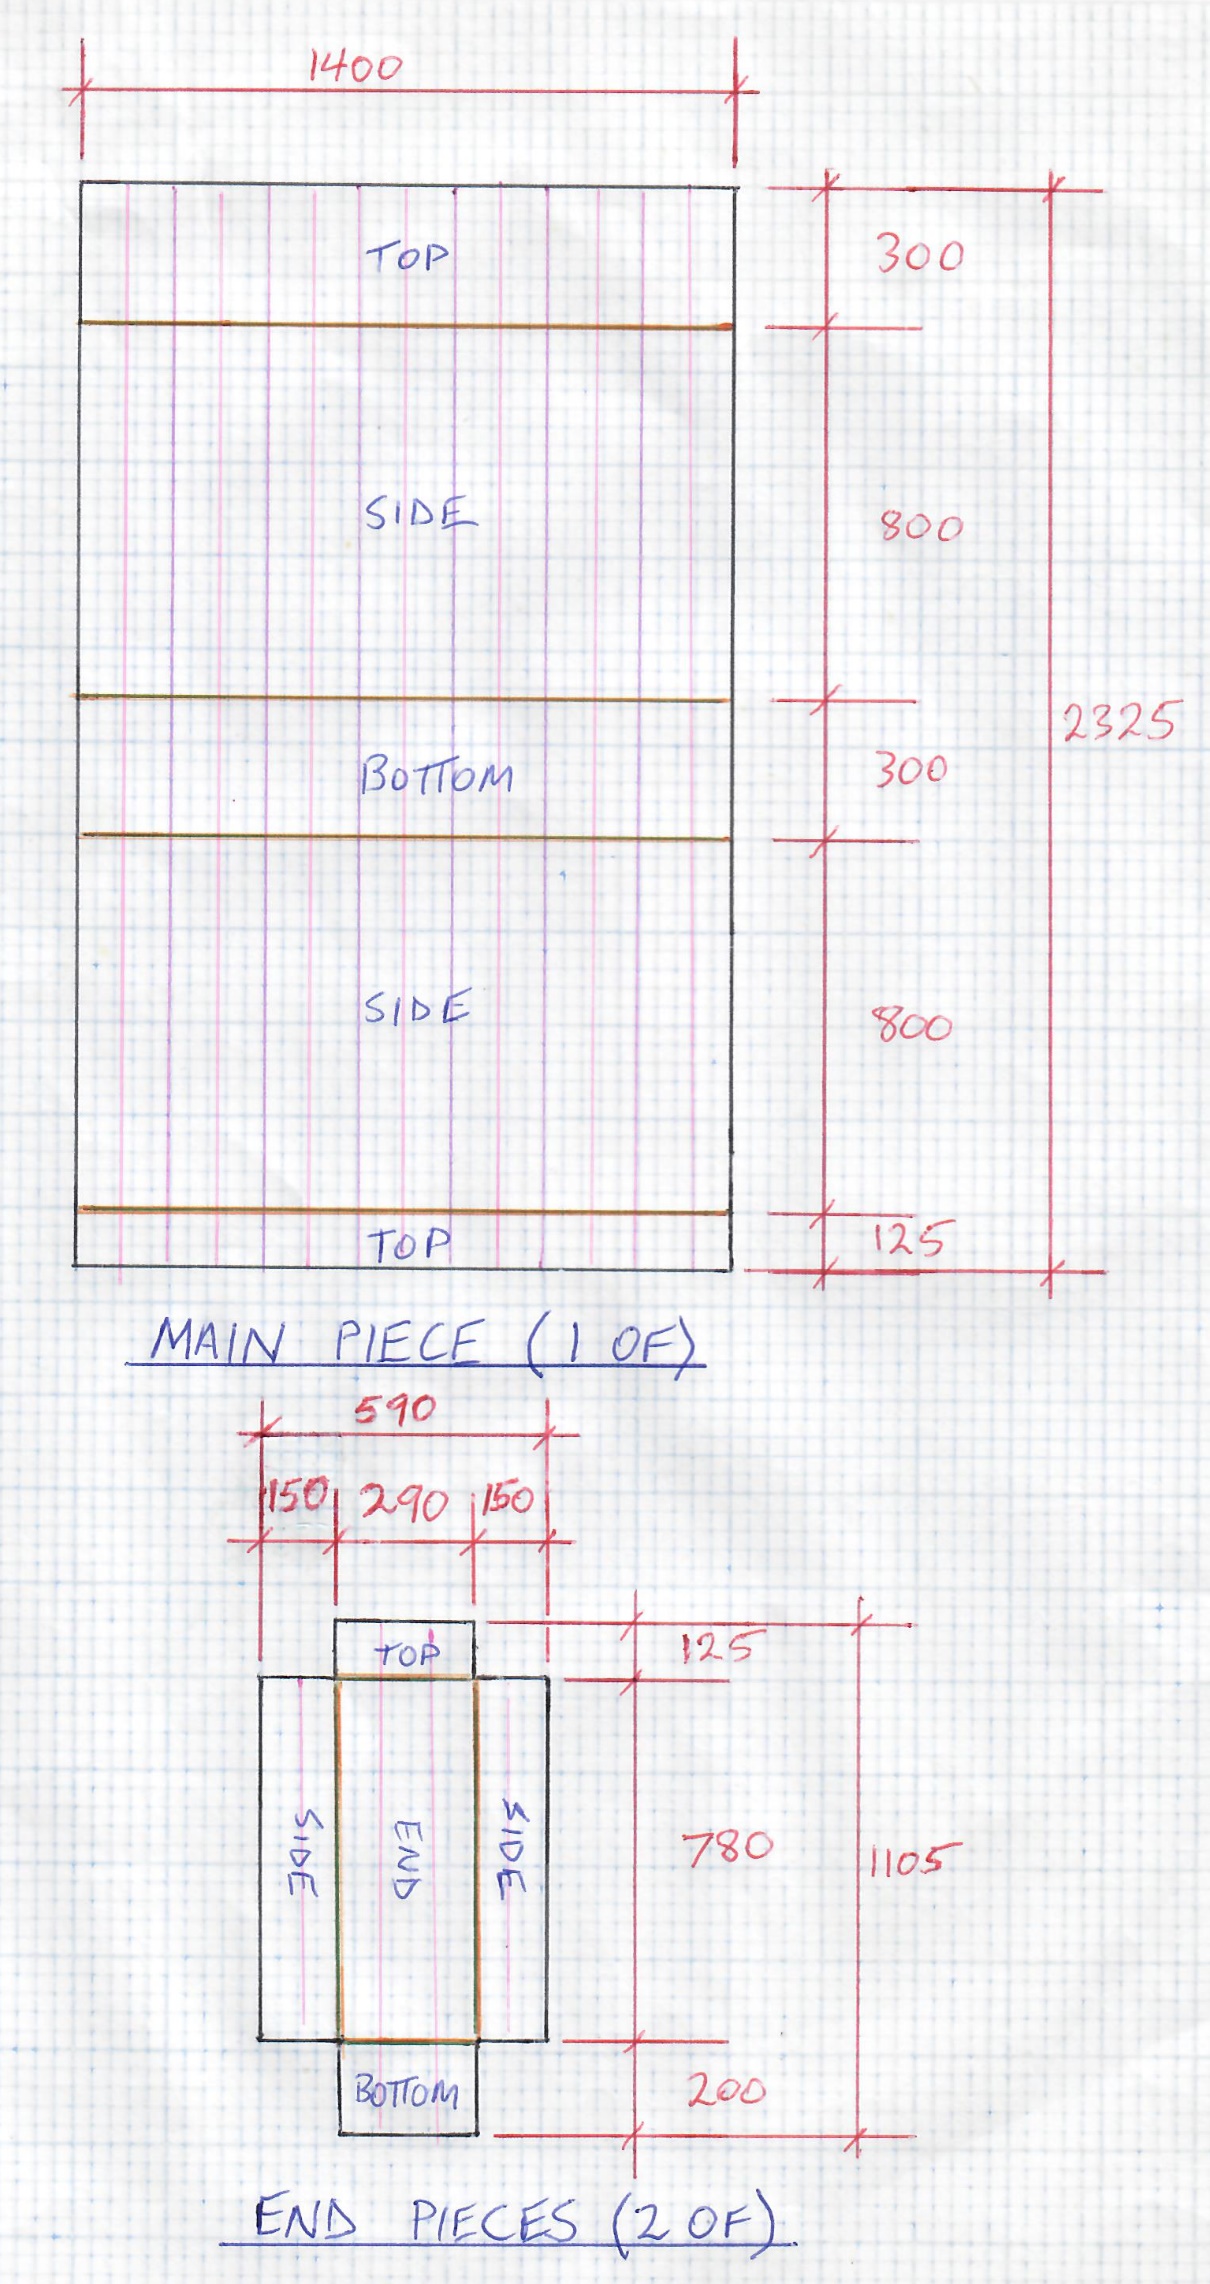
Figure 1: Drawing. All dimensions in mm. Corflute thickness 5 mm.
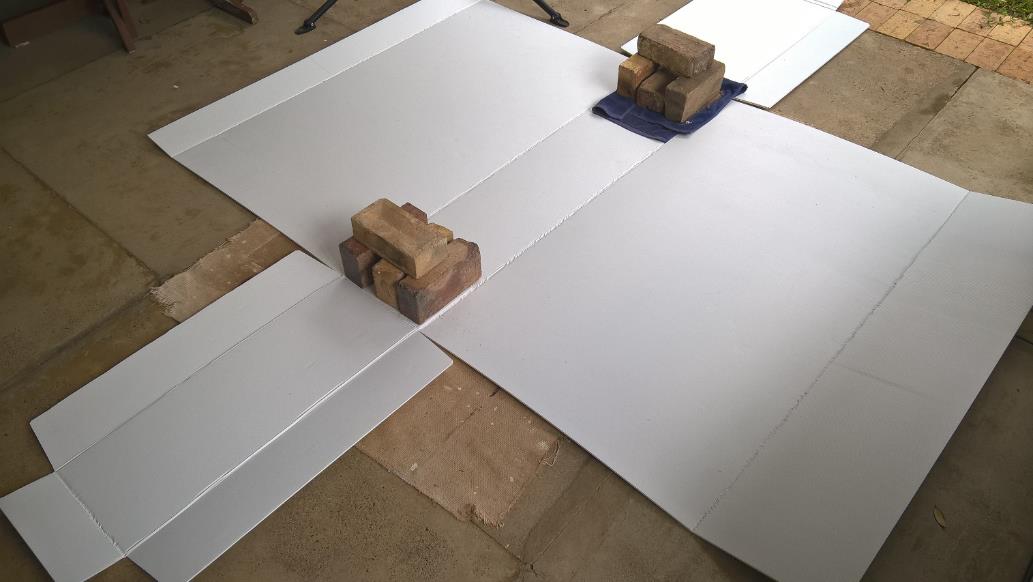
Figure 2: First stage of gluing.
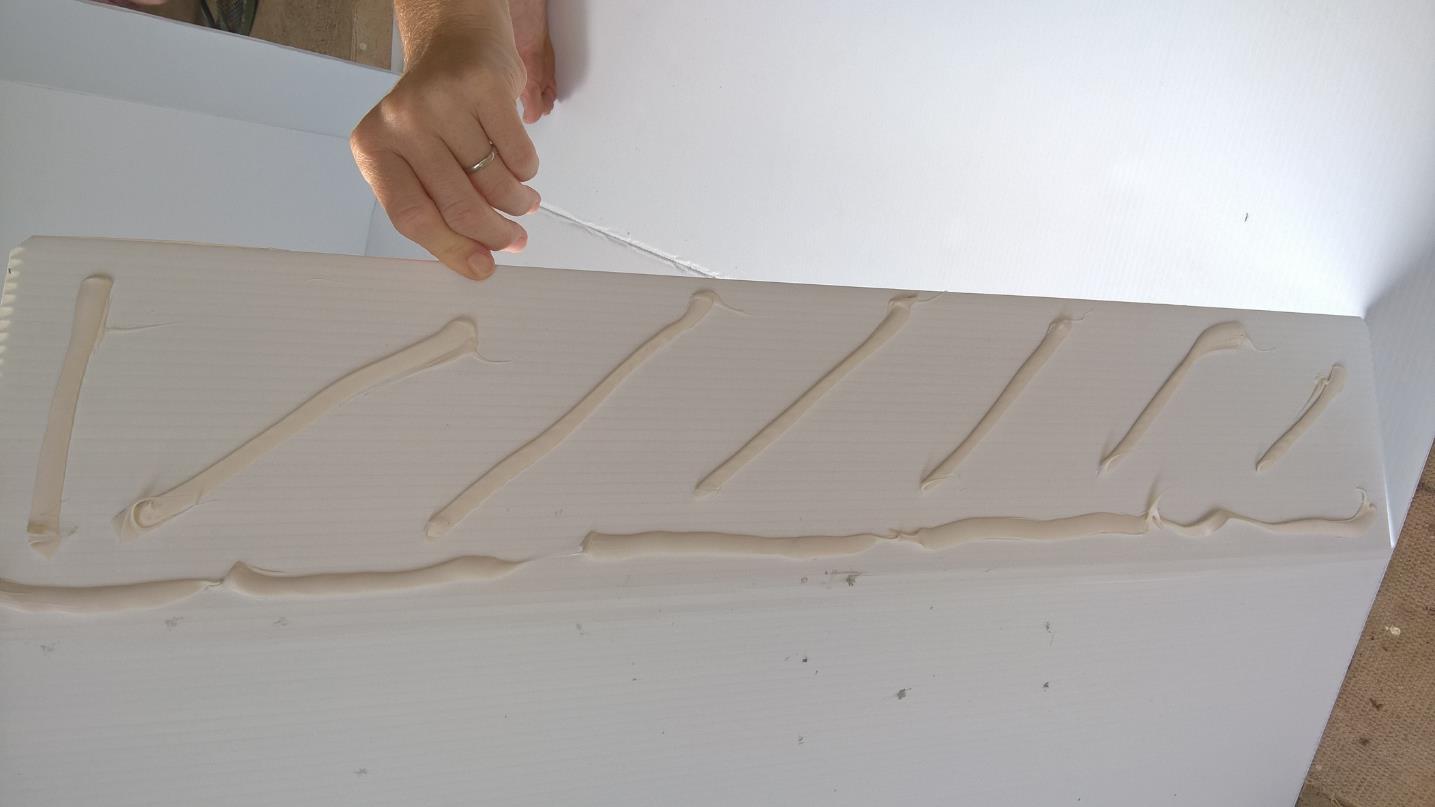
Figure 3: Glue pattern.
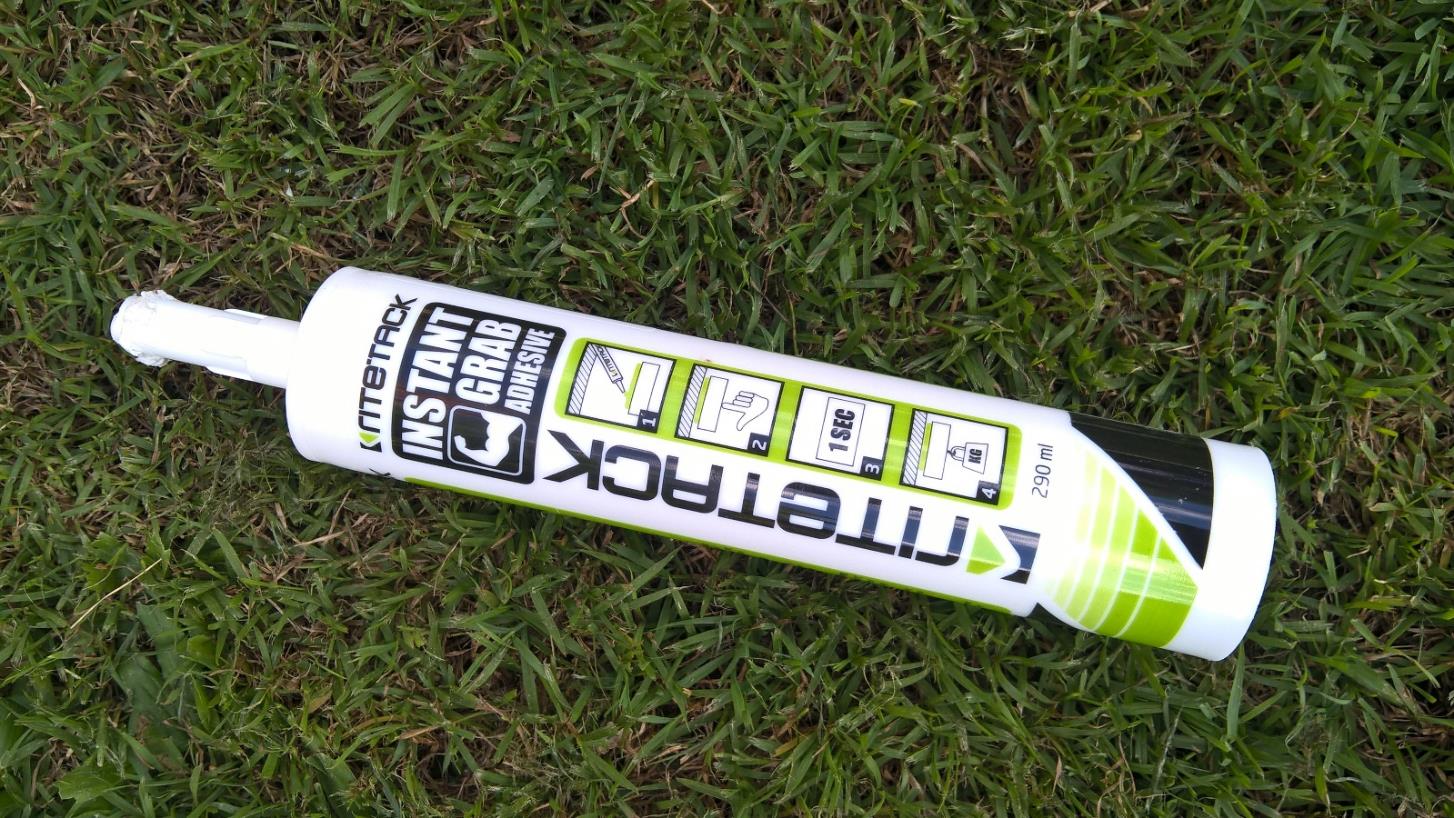
Figure 4: Adhesive.

Figure 5: Finished box showing hook and loop fastener.
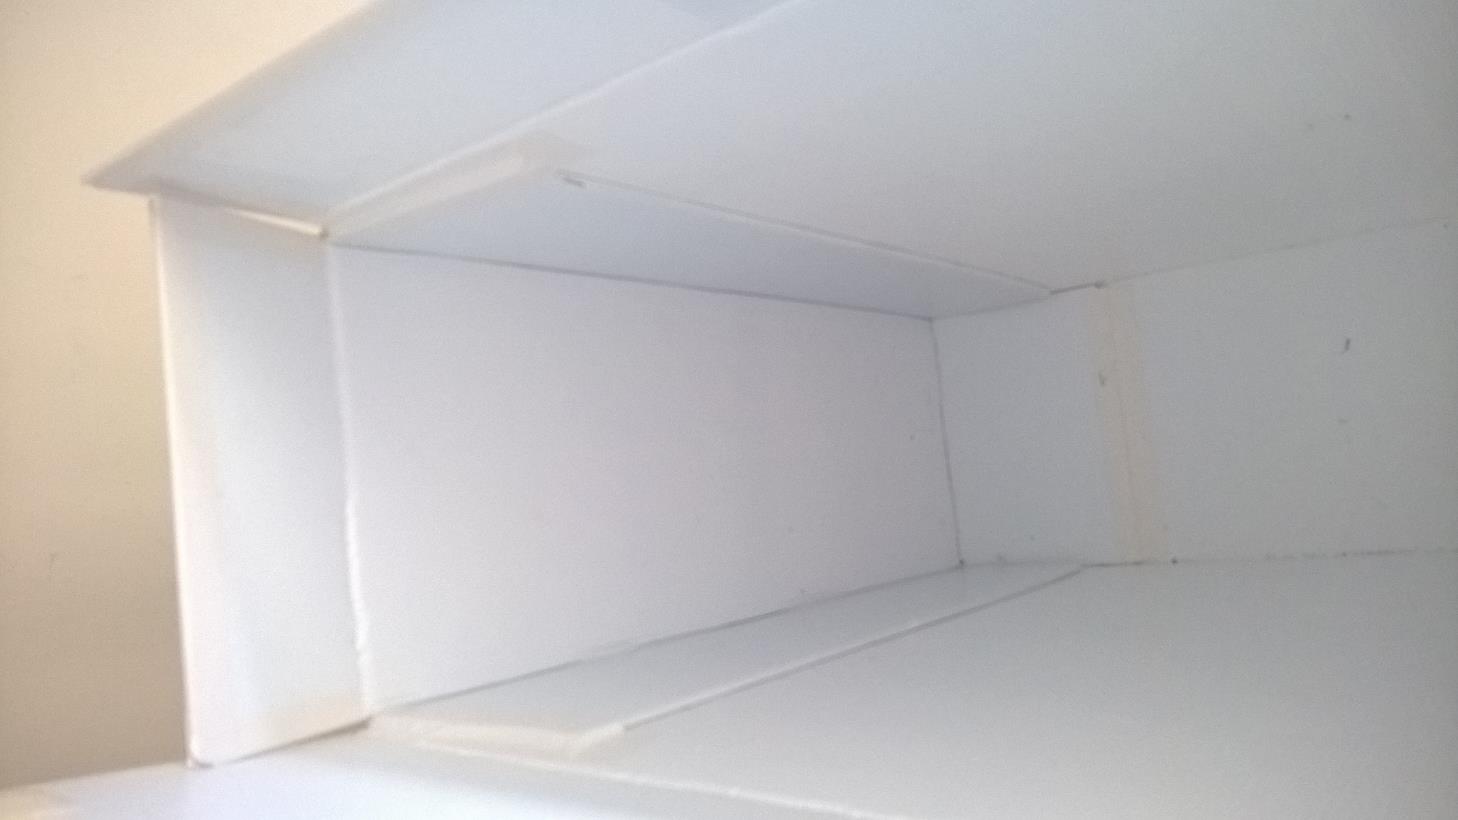
Figure 6: Finished box internal.
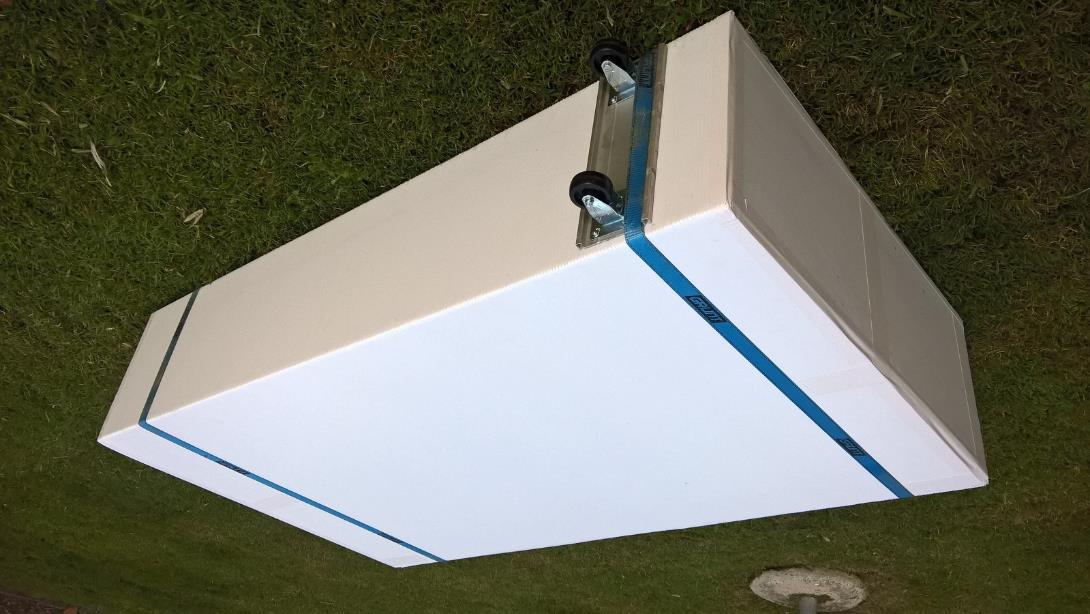
Figure 7: Trolley secured by luggage strap.
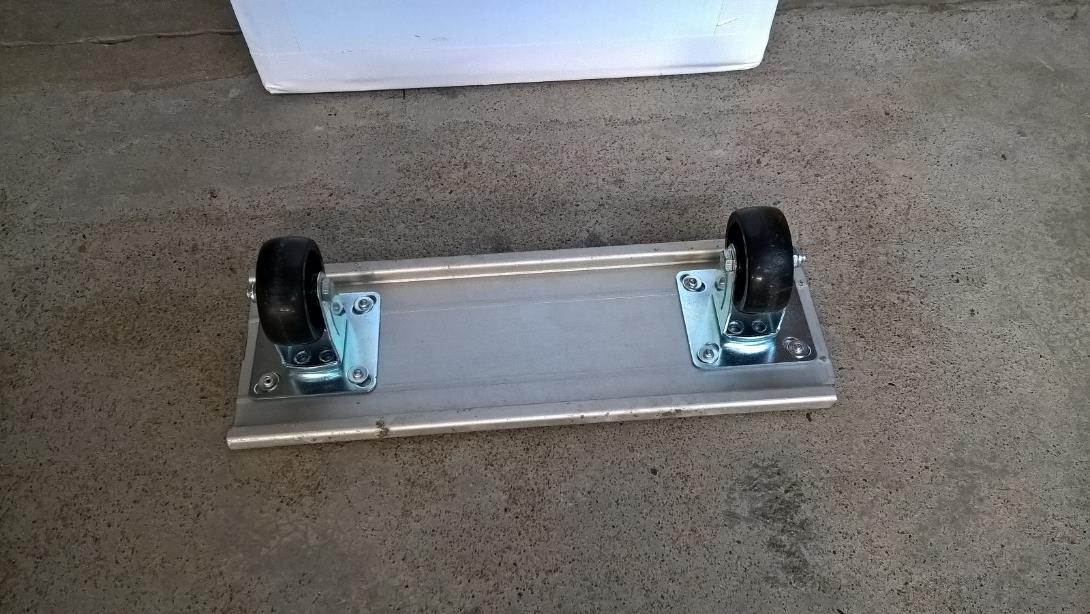
Figure 8: Trolley made from scrap aluminium channel and two wheels secured by rivets with washers.

Comments are closed.